This post explains all the steps required to install Node.js(nodejs or node js) on Windows. For demonstration, we will install the currently available LTS version, 10.15.3 LTS. The steps required to install version 11 should be similar to those explained in this post.
Step 1: Download
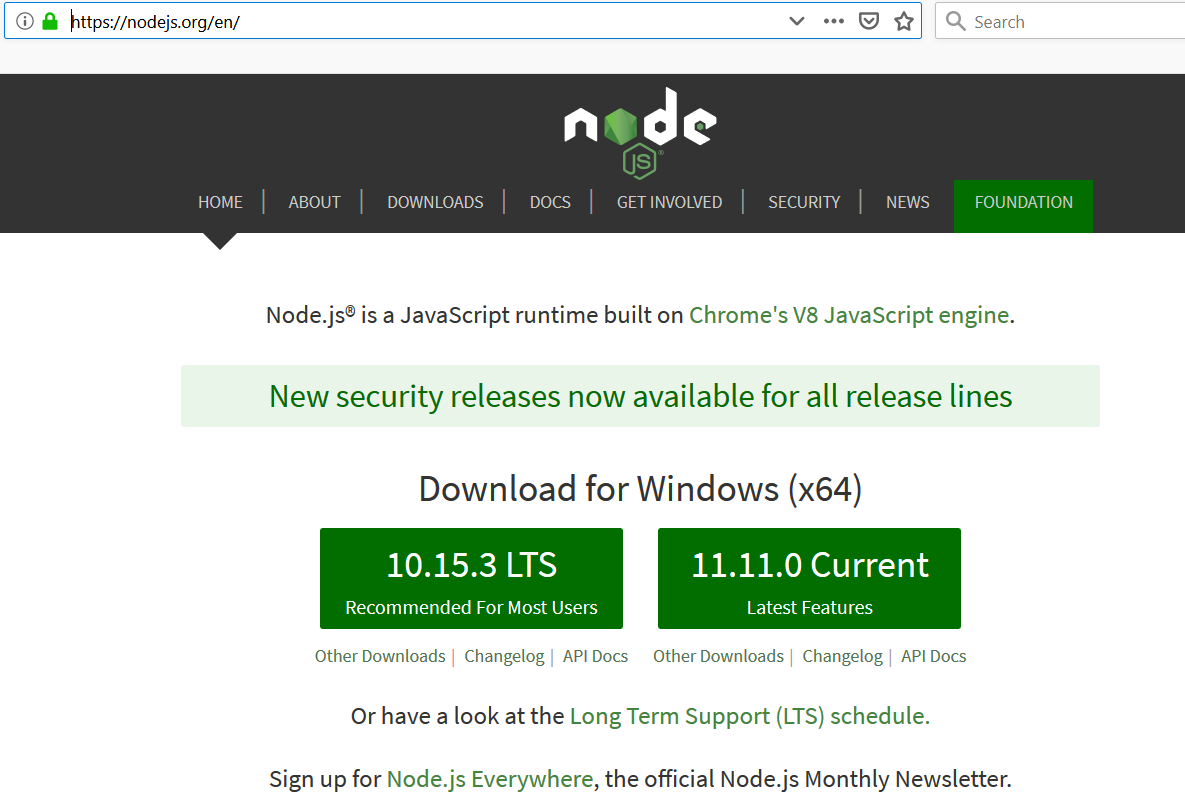
Click on this link to open the Node.js site. The home page shows the available download options as shown in Fig 1.

Fig 1
Click on the left-side Button with the version marked as LTS. It starts the download file with the MSI extension.
Step 2: Install
Double-click the downloaded MSI installer to start the installation. It will display the welcome screen, as shown in Figure 2.

Fig 2
Click on the Next Button to start the installation. It will display the License Agreement, as shown in Figure 3.

Fig 3
Accept the License Agreement and click on the Next Button. The next screen asks the installation location as shown in Fig 4.

Fig 4
Choose the appropriate location to install Node.js and click on Next Button. The installer shows the packages to be installed. We will keep the default options as shown in Fig 5.

Fig 5
Click on Next Button keeping the default packages including Node.js runtime and the npm package manager.

Fig 6
The screen asks to confirm the installation. Click on the Install button to start the actual installation. The installer will ask for system permission. Allow the installer to proceed ahead and it will show installation progress as shown in Fig 7.

Fig 7
On successful installation, the success message is shown in Fig 8.

Fig 8
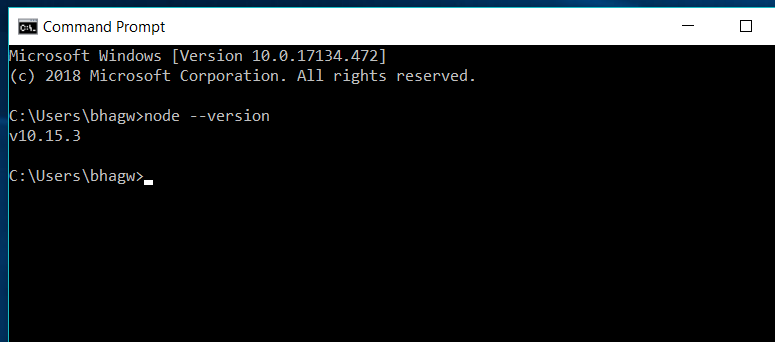
Now click on Finish Button to close the installer. Open the Command Line Tool and confirm the Node.js version as shown in Fig 9.

Fig 9
This is how we can install Node.js on Windows 10. The steps to install Node.js on other versions of windows should be the same.

