XAMPP is a complete package to install the Apache Web Server, MySQL, PHP, Perl, FTP Server, and phpMyAdmin for Linux, Solaris, Windows, and Mac OS X. It also provides an interface to admin Apache Web Server, MySQL, and PHP. This tutorial provides all the steps required to install XAMPP on Windows 10. The steps should be similar for other versions of Windows.
Download XAMPP
Download the most recent version of XAMPP from SourceForge or Apache Friends. The XAMPP page on SourceForge looks like the one in Fig 1.

Fig 1
The XAMPP page on Apache Friends looks like the one as shown in Fig 1a.

Fig 1a
Click the Download Button to start the download. Also, note that XAMPP from Apache Friends supports PHP 8. I have downloaded the XAMPP installer from SourceForge for demonstration purposes. The steps should be the same for the installer downloaded from the Apache Friends website.
Install XAMPP
Now execute the installer to start installing XAMPP on Windows. It showed me antivirus and UAC warning as shown in Fig 2 and Fig 2a.

Fig 2

Fig 2a
In case you also get these warnings, press the Yes Button and OK Button to continue with the installation. It will show the Welcome Screen as shown in Fig 3.

Fig 3
Click the Next Button to continue with the installation. The next screen provides options to choose the components to be installed on the Windows system as shown in Fig 4.

Fig 4
It shows that Apache and PHP are mandatory components and provide options to deselect the remaining components. Choose appropriate components to be installed and click on the Next Button. To start with PHP development, you can select at least Apache, MySQL, PHP, and phpMyAdmin. The next screen provides options to choose the installation directory as shown in Fig 5.

Fig 5
Choose the appropriate installation directory and press the Next Button to continue with the installation. The next screen provides options to choose the Language as shown in Fig 6.

Fig 6
Choose the appropriate language and press Next Button to continue with the installation. The next screen provides options to learn more about Bitnami for XAMPP as shown in Fig 7.

Fig 7
You may keep the checkbox checked. It will open the Bitnami page for XAMPP to learn more about it. Now click the Next Button to finalize the selections. The next screen shows the confirmation message to start the actual installation of the components as shown in Fig 8.

Fig 8
Click the Next Button to start installing the components. It will show the installation progress as shown in Fig 9.

Fig 9
It will show the success message after completing the installation as shown in Fig 10.

Fig 10
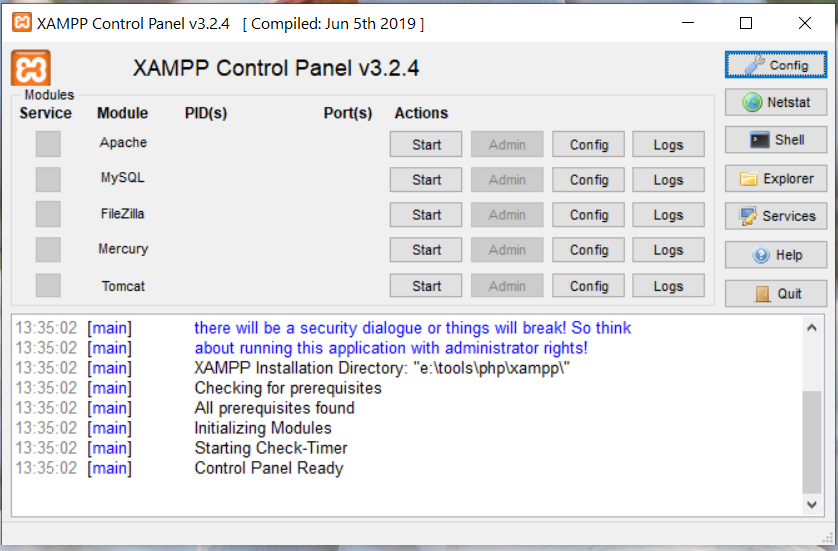
It also provides options to start the Control Panel for the first time. You may keep the option checked and click the Finish Button to close the installer. It will launch the XAMPP Control Panel. It looks like the one as shown in Fig 11.

Fig 11
It provides options to start, stop, and configure the components selected at the start of the installation.
Start Apache
In this step, we will start the Apache Web Server and open the default page. Click the Start Button next to apache to start the webserver. It might show the windows security warning for the first time as shown in Fig 12.

Fig 12
It shows the status of the Apache Web Server and ports used by it to access it from the browser as shown in Fig 13.

Fig 13
Now open the Browser of your choice and enter the URL http://localhost. It will show the XAMPP dashboard as shown in Fig 14.

Fig 14
Now click the PHPInfo Link. It will show the complete details of the PHP version and the packages as shown in Fig 15.

Fig 15
Other Components
Similar to Apache, we can start and stop the other components including MySQL, FileZilla, Mercury, and Tomcat. We can access the phpMyAdmin application from the XAMPP Dashboard as shown in Fig 14.
Summary
In this tutorial, we have discussed the steps required to install XAMPP on Windows 10. We can install and admin Apache, PHP, MySQL, FileZilla, Mercury, Tomcat, and phpMyAadmin on windows using XAMPP instead of installing and configuring these components separately.

