Visual Studio Code or VSCode is a cross-platform, lightweight editor and became popular in a very short span. It provides support for several programming languages. It also supports plugin development and there are several community-driven plugins available for it.
In this tutorial, we will discuss how to install and prepare Visual Studio Code or VSCode for Java development on the popular Linux distribution i.e. Ubuntu. It provides several features for Java development including IntelliSense, Syntax Highlighting, Bracket Matching, Snippets, Linting, etc. This tutorial provides all the steps required to install VSCode on Ubuntu 18.04 LTS, though the steps should be similar for other Linux systems.
Notes: It assumes that Java is already installed on the system. You may also be interested in How To Install OpenJDK 12 On Ubuntu, How To Install Java 11 On Ubuntu, and How To Install VSCode For Java On Windows. You can also follow How To Install IntelliJ IDEA for Java on Ubuntu to install IntelliJ IDEA on the popular Debian based Linux distribution - Ubuntu.
Step 1: Download Visual Studio Code
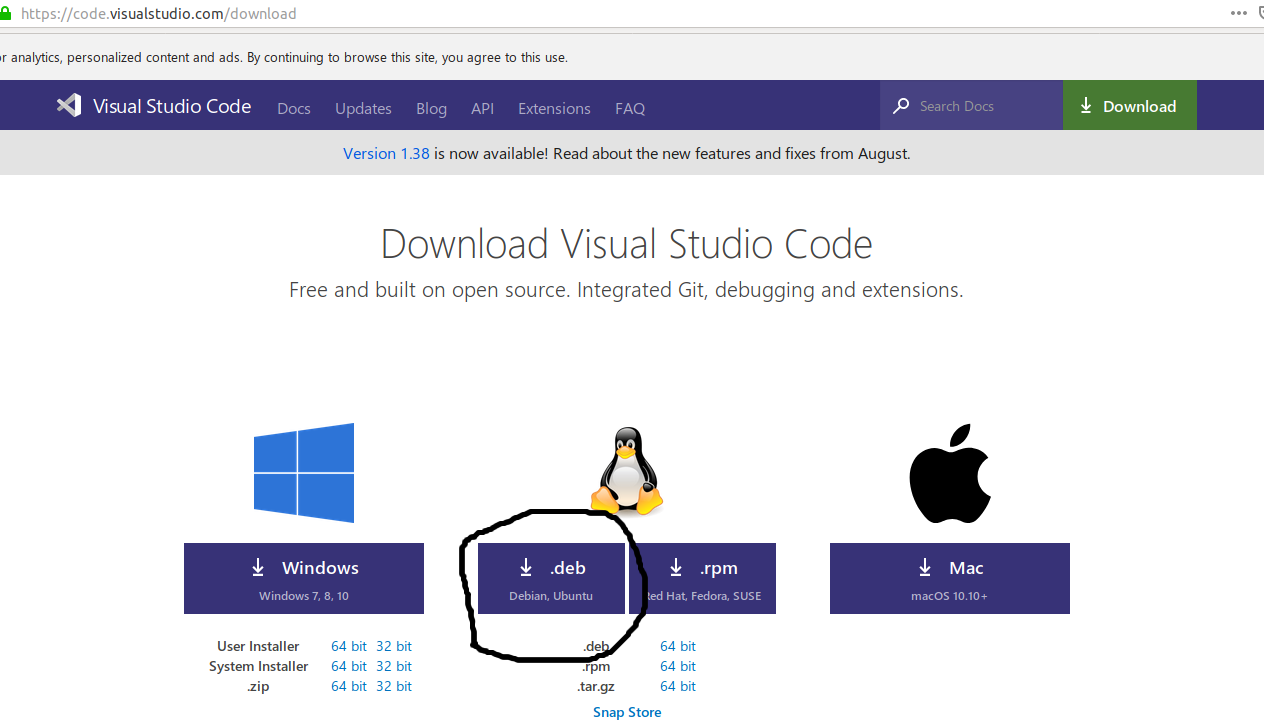
We can download Visual Studio from the official download page. It provides options for Ubuntu as shown in Fig 1.

Fig 1
Click on the .deb Download Button to start the download. You can also download the
Step 2: Install Visual Studio Code
In this step, we will install the Visual Studio Code downloaded by us in the previous step. Double click the installer to execute it. It will show the installer screen as shown in Fig 2.

Fig 2
Click on the Install Button to start installing VSCode. It will show installation progress as shown in Fig 3.

Fig 3
After successful installation, it will show the final screen as shown in Fig 4.

Fig 4
Now close the screen to complete the installation. Click on the Show Applications icon at the bottom right corner of Ubuntu 18.04. It should show Visual Studio Code as shown in Fig 5.

Fig 5
You may add it to your Favorite Apps or create a desktop shortcut icon based on your preferences. Launch VSCode to start coding in Java. It will show the welcome screen as shown in Fig 6.

Fig 6
Step 3: Marketplace
You can see all the available plugins on the Marketplace dedicated for Visual Studio Code. Type java in the search box and click on the Search Button. The results should be similar to one as shown in Fig 7.

Fig 7
We can also browse the available extensions within the IDE by clicking on View -> Extensions or press Ctrl + Shift + x. Enter java on the Search Box and hit Enter Key. It will show the same extensions list within the IDE as we saw on the Marketplace Page as shown in Fig 8.

Fig 8
Step 4: Install Extensions
We will install the most important extensions as part of this tutorial. Also, make sure that you are using the most recent version of Java. Your system should have at least Java 10 or OpenJDK 10 to use the new features available in Java.
Language Support for Java(TM) by Red Hat, Code Runner, and Debugger For Java are the most important extensions that every Java developer must install for Visual Studio Code. The other extensions can be installed based on the requirements. Install both the extensions as shown in Fig 12 and Fig 13.
Notes: We can also install the recommended Java Extension Pack including Language Support for Java(TM) by Red Hat, Debugger For Java, Maven For Java, Java Dependency Viewer, and Java Test Runner.

Fig 9

Fig 10
Also, install the extension Code Runner to execute the program.

Fig - Code Runner
Step 5: Getting Started with Java - Hello World
In this section, we will create our Hello World i.e. HelloJava project and write and execute the first program using Visual Studio Code.
Click on File -> Open Folder or press Cntrl + K and Cntrl + O to open the File Chooser to select the project folder. It will open the selected folder as highlighted in Fig 11.

Fig 11
Now click on the New File Icon as highlighted in Fig 12.

Fig 12
Enter the file name as Hello.java and hit the Enter Key. It will create the Java file as shown in Fig 13.

Fig 13
Update the file and write the first program to print Hello Java as shown in Fig 14.

Fig 14
Now right-click the file and choose the option Run Code. It will compile the Java file, open the terminal within the editor, and execute the code as shown in Fig 15 and Fig 16.

Fig 15

Fig 16
This is how we can install Visual Studio Code for Java development. We have also written our first hello world program and executed it within the editor using the Code Runner extension.

