This tutorial will discuss all the steps required to configure Wireless LAN in Ubuntu 18.04 (Bionic Beaver). The system must have a wireless card or device connected to it to allow it to connect to available networks. We might need to check for the proper driver if Ubuntu does not support the device out of the box.
Step 1: Open the Quick Settings Panel by clicking the icon on the top right as shown in Fig. 1.

Fig. 1
Step 2: The Quick Settings Panel shows that the system is not connected to any network as shown in Fig. 2.

Fig. 2
Step 3: Click on Select Network from network selection options as shown in Fig. 3.

Fig. 3
Step 4: Identify your network from the available networks as shown in Fig. 4.

Fig. 4
Step 5: Now choose your network from the available networks by clicking on it as shown in Fig. 5.

Fig. 5
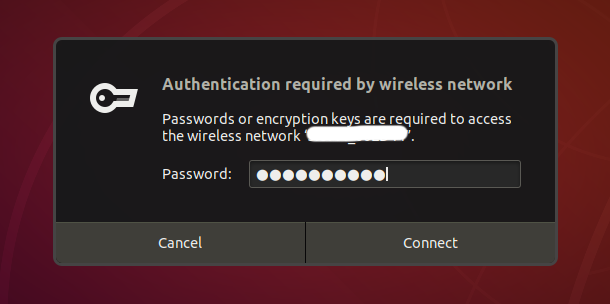
Step 6: If the network is password protected, it will ask to fill the password as shown in Fig. 6 and Fig. 7.

Fig. 6

Fig. 7
Step 7: Now click on the Connect Button after providing valid password. On success, the wireless symbol will be displayed as shown in Fig. 8.

Fig. 8
Step 8: We can see the active network by clicking the top right icon as shown in Fig. 9.

Fig. 9
This is how we can configure Wireless LAN in Ubuntu 18.04 (Bionic Beaver).

