The official definition of JavaFX - OpenJFX is an open source, next generation client application platform for desktop, mobile and embedded systems built on Java.
JavaFX in an open-source platform and follows GPL with the class path exception, similar to OpenJDK. This tutorial provides all the steps required to write the Hello World Application in JavaFX on macOS using e(fx)clipse plugin for the Eclipse IDE and JavaFX SDK. We can also use either of the build systems among Maven or Gradle instead of JavaFX SDK. It assumes that Java and eclipse are already installed on the system.
The tutorials relevant to installing Java and Eclipse include How To Install Java 13 On Mac, How To Install Java 14 On Mac, How To Install OpenJDK 14 On Mac, and How To Install Eclipse For Java On Mac.
You can also refer to Hello World in JavaFX for Windows and Ubuntu. I have used OpenJDK 14.0.1, Eclipse Java 2020 03 R, e(fx)clipse 3.6.0, and JavaFX SDK 14 while writing this tutorial.
Step 1: Install e(fx)clipse Plugin
In this step, we will install the e(fx)clipse plugin for the Eclipse IDE. Click the Help Option on the Main Menu and click the Eclipse Marketplace Option as shown in Fig 1.

Fig 1
Search for JavaFX as shown in Fig 2.

Fig 2
Now click the Install Button to start installing e(fx)clipse plugin on Eclipse. It will show the installation progress and ask to accept the License Agreement as shown in Fig 3 and Fig 4.

Fig 3
It might throw an error at this stage. In such case, again follow the steps as shown in Fig 1 and Fig 2.

Fig 4
Accept the License and click the Finish Button to start the installation. It will ask to accept the Certificate and restart the IDE after successfully installing the plugin as shown in Fig 5 and Fig 6.
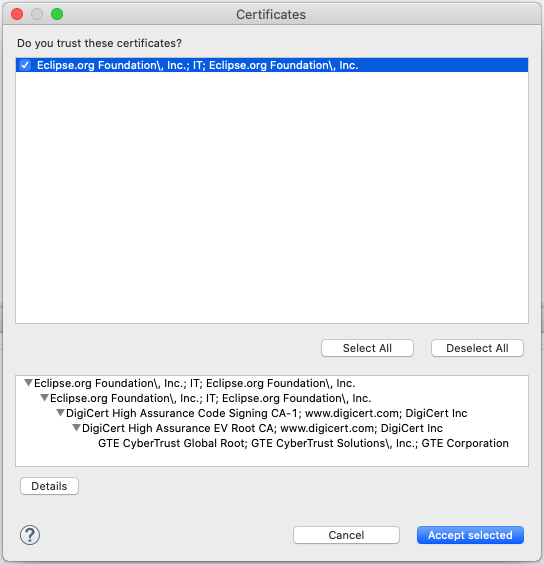
Fig 5

Fig 6
Click Restart Now to apply the plugin-specific changes. This completes the installation of e(fx)clipse plugin on Eclipse.
Step 2: Create JavaFX Project
Now click the New Option on Main Menu and click the Other Option as shown in Fig 7.
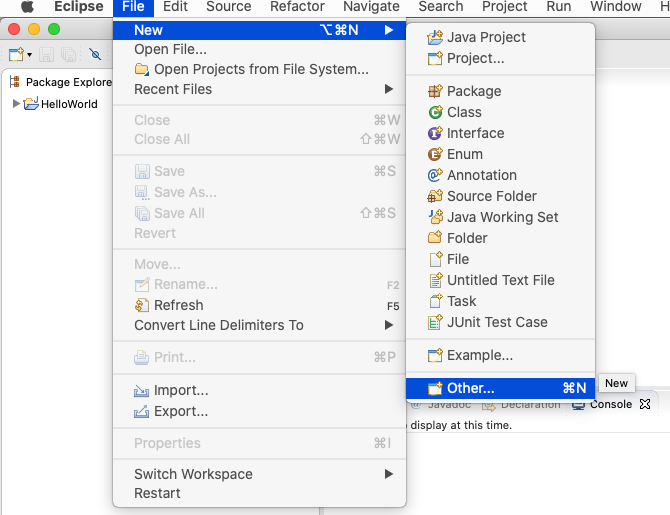
Fig 7
It will show the project type selection wizard as shown in Fig 8.

Fig 8
Now click the Next Button to configure the project as shown in Fig 9.

Fig 9
Configure the project and click the Next Button. We can further configure the Java for the project as shown in Fig 10.
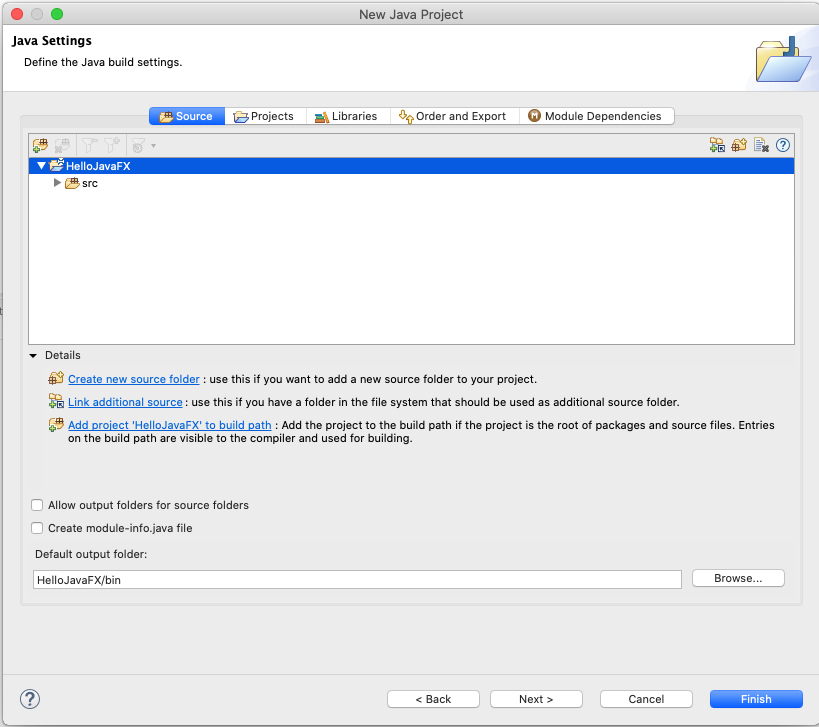
Fig 10
Now click the Next Button to configure the Application as shown in Fig 11.

Fig 11
Finally, click the Finish Button to complete the project creation and configuration. It will create the project and shows on the projects library as shown in Fig 12.

Fig 12
Step 3: Fix the Imports
In this step, we will fix the imports by creating a user-defined library since JavaFX is not bundled with the JDK since Java 11. We need to create this library for the first time and it can be used for multiple projects. Open the Application Class file to view the import errors as shown in Fig 13.

Fig 13
Download the JavaFX SDK from the official website. We can use either JavaFX 11 LTS or JavaFX 14 as shown in Fig 14. I have downloaded JavaFX 14 SDK as highlighted in Fig 14.

Fig 14
Now extract the downloaded JavaFX SDK to the appropriate location. We will add a new user-defined library to the eclipse. Click the Eclipse Option on the Main Menu and navigates to Preferences -> Java -> Build Path -> User Libraries and click the New Button as highlighted in Fig 15.

Fig 15
On clicking the New Button, it will ask the library name as shown in Fig 16.

Fig 16
Provide the appropriate library name and click the OK Button. It will create the library as shown in Fig 17.

Fig 17
Now click the Add External JARs Button as shown in Fig 17. It will ask to choose the JARs to be added to the library created by us. Navigate to the lib directory of the JavaFX SDK downloaded by us and select the JARs as shown in Fig 18.

Fig 18
Now click the Open Button to add the JARs to the library. The library gets updated with the selected JARs as shown in Fig 19.

Fig 19
Click the Apply and Close Button to finalize the library. Now right-click the project and click the Properties Option as shown in Fig 20.
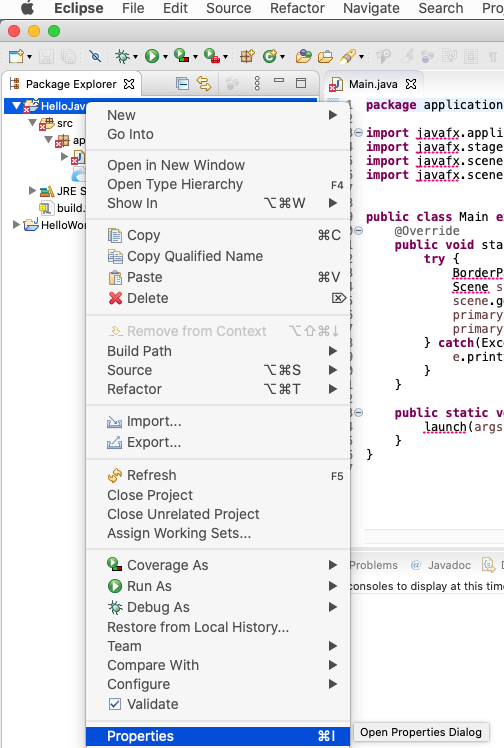
Fig 20
Click the Java Build Path and Libraries as shown in Fig 21. I have also highlighted the Classpath.

Fig 21
Click the Add Library Button on the left side to add the library created by us. It will open the wizard to add the library as shown in Fig 22.

Fig 22
Now choose User Library and click the Next Button. It will show all the user libraries as shown in Fig 23 and Fig 24.

Fig 23

Fig 24
Choose the JavaFX library created by us and click the Finish Button. Also note that I have removed the JavaFX SDK library added by the e(fx)clipse plugin. Now click Apply and Close Button. It will add the library to our project and also resolve the import errors as shown in Fig 25.

Fig 25
Step 4: Run the Project
In this step, we configure the project runtime and run the project. Now right-click the Project -> Run As -> Java Application as shown in Fig 26.

Fig 26
It will ask to choose the Main Class as shown in Fig 27.

Fig 27
Now choose the Main class and click the OK Button to execute the application. It will show the missing runtime error as shown in Fig 28.

Fig 28
So, the default run configuration did not execute our project since it's missing the JavaFX runtime components. We can configure it for the project by creating our own Run Configuration. Now right-click the Project -> Run As -> Run Configuration as shown in Fig 29.

Fig 29
It will show the run configurations as shown in Fig 30.
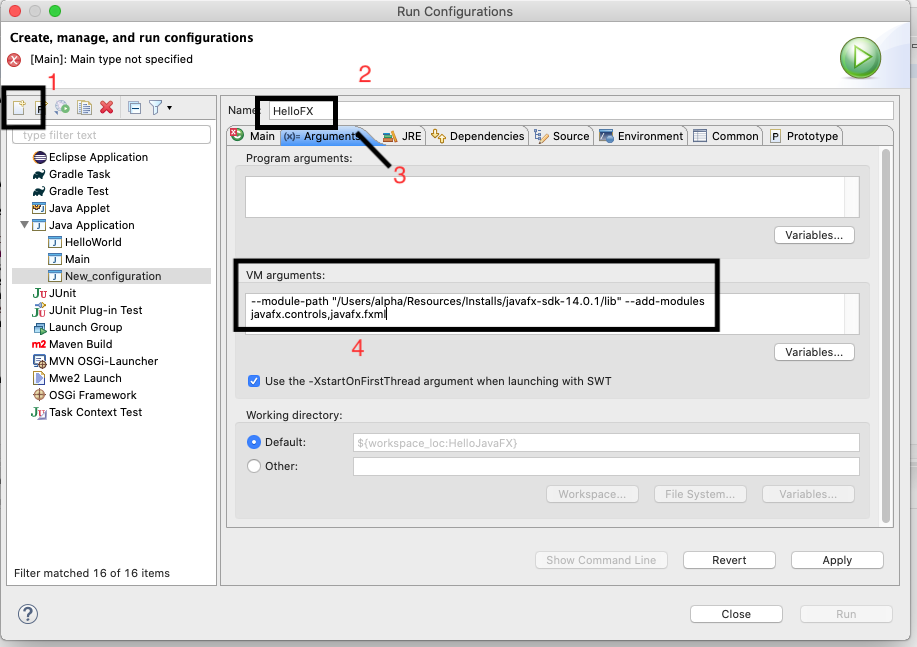
Fig 30
Now click the New launch configuration Icon as highlighted in Fig 30 and configure the Arguments. Click the Arguments Tab and use the below-mentioned arguments by providing the appropriate path to the JavaFX SDK.
--module-path "<JavaFX SDK Path>/lib" --add-modules javafx.controls,javafx.fxml
Also, configure the Main Class as shown in Fig 31.

Fig 31
Now click the Apply Button and click the Run Button to execute the application using the Run Configuration created by us. It might throw an error as shown in Fig 32 on macOS Mojave and macOS Catalina since the OpenGL is deprecated on these operating systems. Apple introduced macOS Metal Framework and deprecated OpenGL.
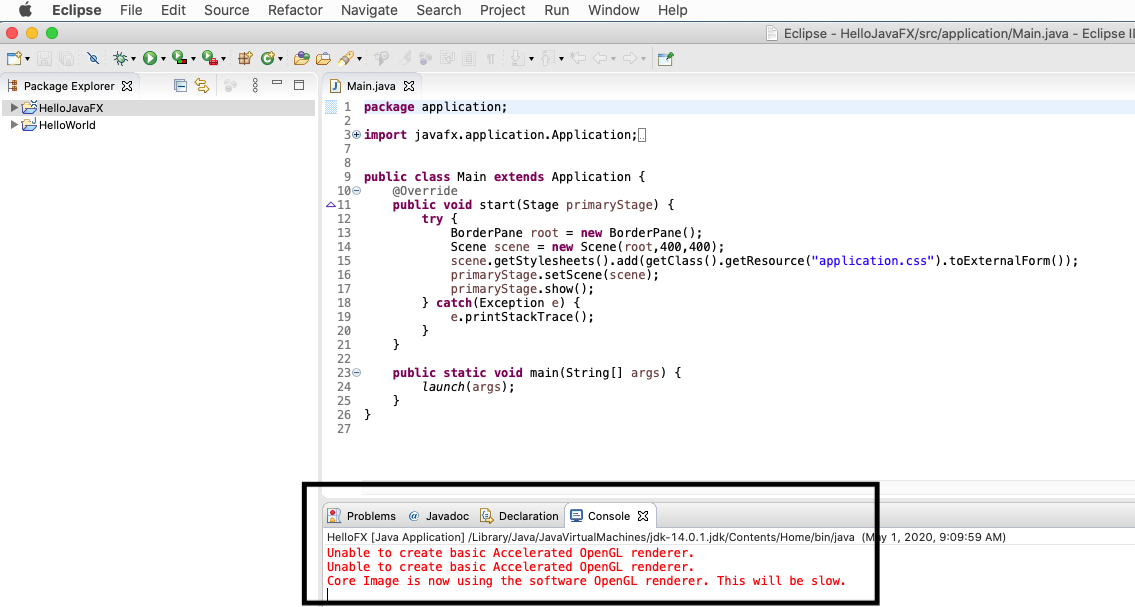
Fig 32
It will build and run the application below macOS Mojave. It will simply show the Coffee Icon without application window. After adding an additional configuration as shown in Fig 33, the application ran fine as shown in Fig 34.

Fig 33

Fig 34
This is the simplest application that can be written using JavaFX.
Summary
This tutorial provided all the steps required to install e(fx)clipse plugin for the Eclipse IDE and also provided all the configurations and processes required to create and execute the first JavaFX application.

