This tutorial explains the steps required to create, build, and deploy an Ionic 4 App to Android Simulator using Cordova on both Windows 10 and Ubuntu 18.04 LTS. The steps should be the same for other versions of Ionic, Windows
We will be using the Hello World application developed in the previous tutorial for demonstration purpose. You can also follow How To Install Android SDK Tools On Windows and How To Install Android SDK Tools On Ubuntu to install Android SDK Tools and create the Simulator without using Android Studio.
Install Cordova
Install Cordova globally if not done yet. Execute the below-mentioned command.
npm i -g cordova
Make sure that the JAVA_HOME environment variable is set and points to the right directory of the Java bin. The below-mentioned steps also expect that a valid environment variable exists with the name ANDROID_HOME and a value that points to the root directory of the Android SDK installed on the system.
Install Platform
Go to the project root in order to install the Android Platform for the project.
# Move to project root
cd <project root>

# Add Android platform
sudo cordova platform add android

# OR - Add latest
sudo cordova platform add android@latest
Configure Package Name
We have to provide unique Bundle Id also called as Package Id to uniquely identify the application in Play Store. It's usually reverse domain name in the case where a website is associated with the application.
Open the file hello\platforms\android\app\src\main\res\xml\config.xml and update the id with the Package Id. Replace the id io.ionic.starter with your Package Id.
Also, update the same id in the application root file hello\config.xml replacing the auto-generated id io.ionic.starter.
Prepare Native Project
The first step involves configuring the native project using Cordova for Android as shown below.
# Prepare
ionic cordova prepare android
We must be in Ionic project directory i.e. the hello app directory else, Ionic will throw an error saying Sorry! ionic Cordova prepare can only be run in an Ionic project directory.
Ionic will ask to install the Android Platform for the first time in case you have not installed in the previous step. Choose Y and hit enter in such a case. The native installation results should be similar to the one shown in Fig 1.

Fig 1
Build the Application
Build the app to check for any errors before running the application. This step is optional since the run command will also build the application. Use the build command as shown below.
// Build the application
ionic cordova build android

// Build with detailed logs
ionic cordova build android --verbose

// Build the application for production
ionic cordova build android --prod --release
The build command will work absolutely fine on the Windows systems. It's
chunk {swiper-bundle-8d61f7c5-js} swiper-bundle-8d61f7c5-js-es5.js, swiper-bundle-8d61f7c5-js-es5.js.map (swiper-bundle-8d61f7c5-js) 209 kB  [rendered]

chunk {tap-click-b300ec79-js} tap-click-b300ec79-js-es5.js, tap-click-b300ec79-js-es5.js.map (tap-click-b300ec79-js) 6.32 kB  [rendered]

chunk {vendor} vendor-es5.js, vendor-es5.js.map (vendor) 4.59 MB [initial] [rendered]

Date: 2019-09-10T08:52:35.098Z - Hash: a60970ffb6a0dd6fcc7f - Time: 25492ms

> cordova build android

Failed to find 'ANDROID_HOME' environment variable. Try setting it manually.

Failed to find 'android' command in your 'PATH'. Try update your 'PATH' to include path to valid SDK directory.

[ERROR] An error occurred while running subprocess cordova.

        cordova build android exited with exit code 1.
        Re-running this command with the --verbose flag may provide more information.
There are few approaches to resolve this error as shown below.
Approach A
Configure the .bashrc file of the user account as shown below.
# Update Bash
sudo gedit ~/.bashrc

# Add at the end of the .bashrc file
export ANDROID_HOME=/drivea/java/android/android-sdk
export PATH=/drivea/java/android/android-sdk/platform-tools:/drivea/java/android/android-sdk/tools:/drivea/java/android/android-sdk/tools/bin:${PATH}

# Reload Bash
source ~/.bashrc

# Remove Android platform
sudo cordova platform rm android

# Add Android platform
sudo cordova platform add android

# OR - Add latest
sudo cordova platform add android@latest

# Ubuntu - Install gradle in case it complains for missing gradle
sudo apt-get install gradle

# Mac - Install gradle
brew install gradle

# Another option is to download the Gradle distribution manually and set the GRADLE_HOME environment variable to it's bin directory
Now try to build the app. In case the Cordova still throws
Approach B
Pass the ANDROID_HOME variable within the build command itself as shown below.
# Pass ANDROID_HOME within the command itself in case Cordova is unable to find it
sudo ANDROID_HOME="/drivea/java/android/android-sdk" ionic cordova build android

# Ubuntu - Install gradle in case it complains for missing gradle
sudo apt-get install gradle

# Mac - Install gradle
brew install gradle

# Another option is to download the Gradle distribution manually and set the GRADLE_HOME environment variable to it's bin directory
Run the Application
We can deploy and run the application either to the physical devices attached to the system or the active virtual devices. Launch the virtual device using
Run the application using the run command, as shown below. Use the verbose option to see detailed logs. Make sure that only one version of Java is on the system classpath; otherwise, Cordova will complain about it and throw an error.
# Install native-run in case it's not installed
sudo npm i -g native-run

# Run the application
ionic cordova run android

# OR
ionic cordova run android -l

# Run in case of missing ANDROID_HOME environment variable
sudo ANDROID_HOME="/office/tools/java/android/android-sdk" ionic cordova run android

# OR
sudo ANDROID_HOME="/office/tools/java/android/android-sdk" ionic cordova run android -l

# Run with detailed logs
ionic cordova run android -l --verbose
You can also launch the application using the ADB as shown below. Make sure that an active device(physical or virtual) is attached to the system.
# Use ADB to deploy the App
adb install <path to your apk built by cordova>
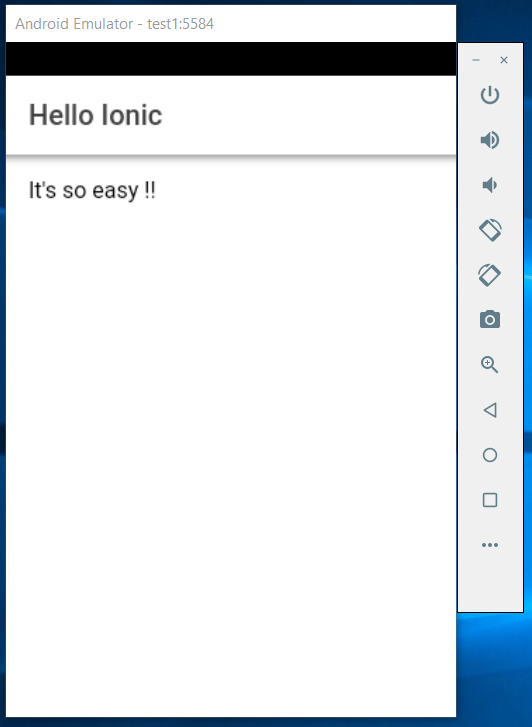
The final output of the Hello Ionic application is as shown in Fig 2.

Fig 2
This is how we can run the application using Ionic 4, Cordova and Android Simulator.

